Provisioning Your Node
Locate the new node in the Unprovisioned Nodes list. Select the role that your node will be ingested as. The simplest way to get up and running is to choose All Swift Services or All Swift Services + File Access . More information on Node Roles can be found at Cluster Node Roles. Select the Zone the node will be a member of. Your cluster currently only has one zone configured, so click the Ingest Now button without making any changes.

Network
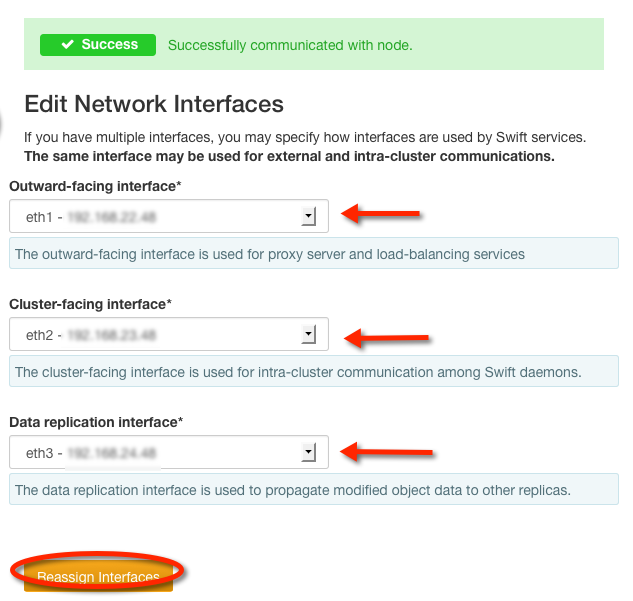
You should now be on the Manage Node page, Network tab.
Verify that your node's network interfaces have been discovered, and assign them correctly to Outward-facing interface and Cluster-facing interface. Click Reassign Interfaces.
Swift Drives
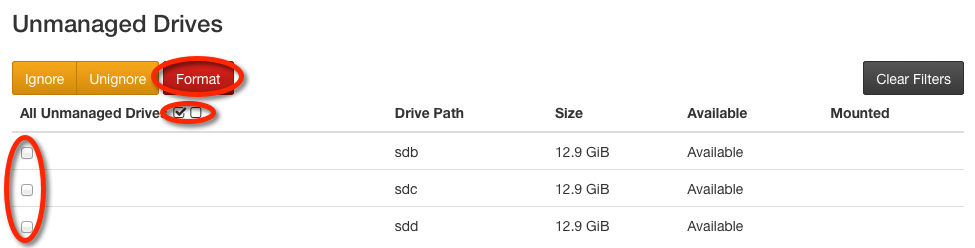
You should be directed to the Manage Drives tab.
Bulk Formatting the Node's Drives
Under the Unmanaged Drives section, locate the drives you wish to format. Often this will be the drives with the status of Available. To select all the drives at once, click the marked checkbox next to All Unmanaged Drives. Click the Format button to format the selected drives.
Note
CentOS nodes may also show the swap and filesystem drives, these will be checked by default to be ignored.
Note
The drives will be formatted immediately, and additional options will be available on the page once that operation is complete.
Bulk Adding the Node's Drives
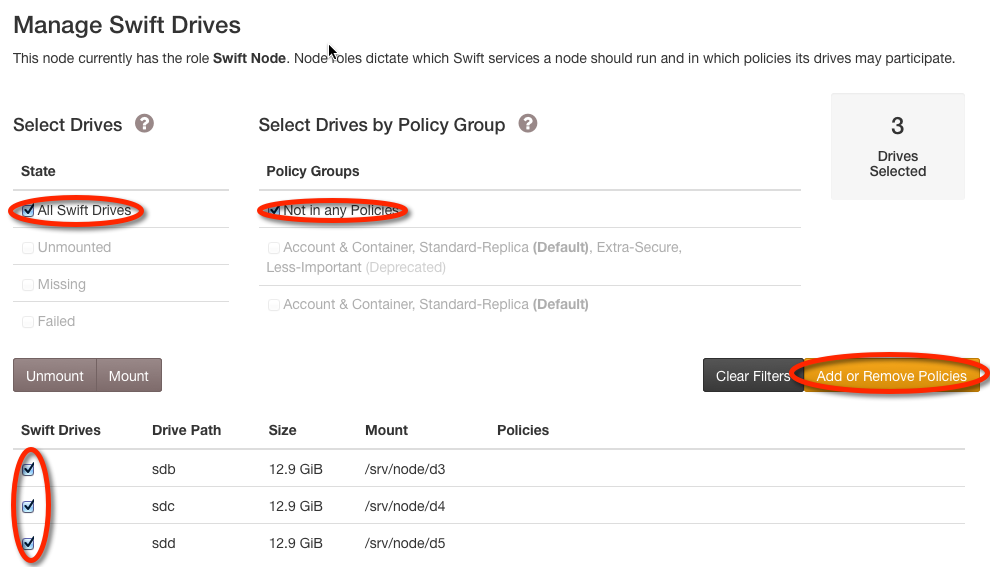
You should now see several sections for managing your drives and adding them to various storage policies. To select all the drives at once, click on the All Swift Drives checkbox under Select Devices. Then click Add Or Remove Policies, which will present a popup where you can select the policies you wish to add these devices to.
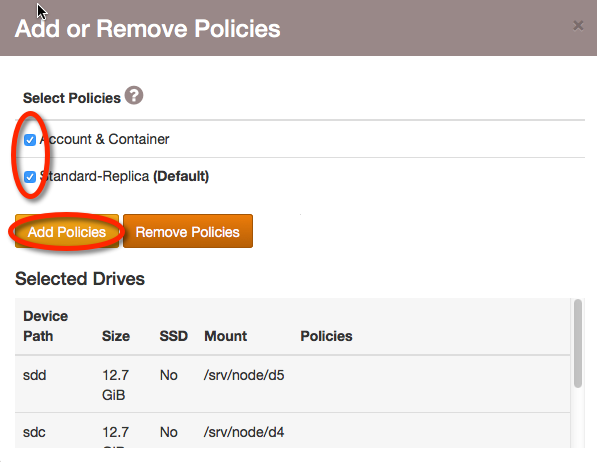
On this popup you will find a list of the profiles configured for your cluster. For more information on configuring policies, see SwiftStack Storage Policies. Right now there will be two policies you can select: Account & Container and Standard-Replica. The former will put the selected drives into the Account & Container policies, which will allow them to respond to requests about Accounts and Containers. The latter, Standard-Replica, is the default Object policy that was created for your cluster. For now, check both boxes and click Add Policies.
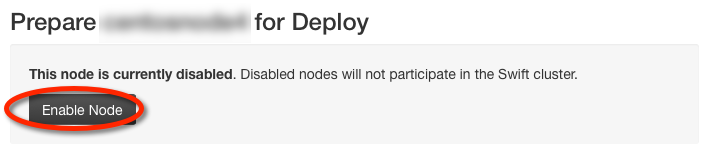
Enabling the Node
Once the drives are configured, the last step in provisioning the node is to enable it. Click on the Enable tab and then click on the Enable button.
You will be redirected to the Manage Cluster page, Nodes tab.
Next Steps
If your cluster has other unprovisioned nodes, repeat the steps on this page for those nodes.
If you added this node to a previously existing and deployed cluster, you can skip to Deploying Changes to the Cluster.
Otherwise, proceed to Adding a Storage Account.