Configuring a New Gateway
There are several options that will need to be configured before you enable and then deploy the Gateway’s configuration.
These options are found on the following pages:
- Auth tab
- Cache tab
- Settings tab - networking
- Shares tab
Auth
Upon ingestion, the Manage Gateway page will open to the Auth options page. There are three sections, Swift Account, CIFS Settings, and LDAP Settings.
Swift Account
Select the Swift Account section and provide the information for the Swift account that has been created as the service account for the Gateway.
This account allows the Gateway to access the Cluster and will be the primary auth for the containers where the NFS and CIFS/SMB files will be stored in Swift.
There are two auth versions to choose from. The auth v1.0 uses the Swift account created on the SwiftStack cluster. The auth v2.0 would be used for a Swift account that would be authenticated with a Keystone auth server.
By default v1.0 is selected. If you wish to use v2.0 you will need the Keystone information -- auth credentials, endpoint and tenant name -- ready to enter.
For this example we will use v1.0.
Enter the Gateway’s service account username and password.
Swift user: usernameSwift password: passwordAuth URL: auth url (can be found on cluster health page)
Click the Submit button.
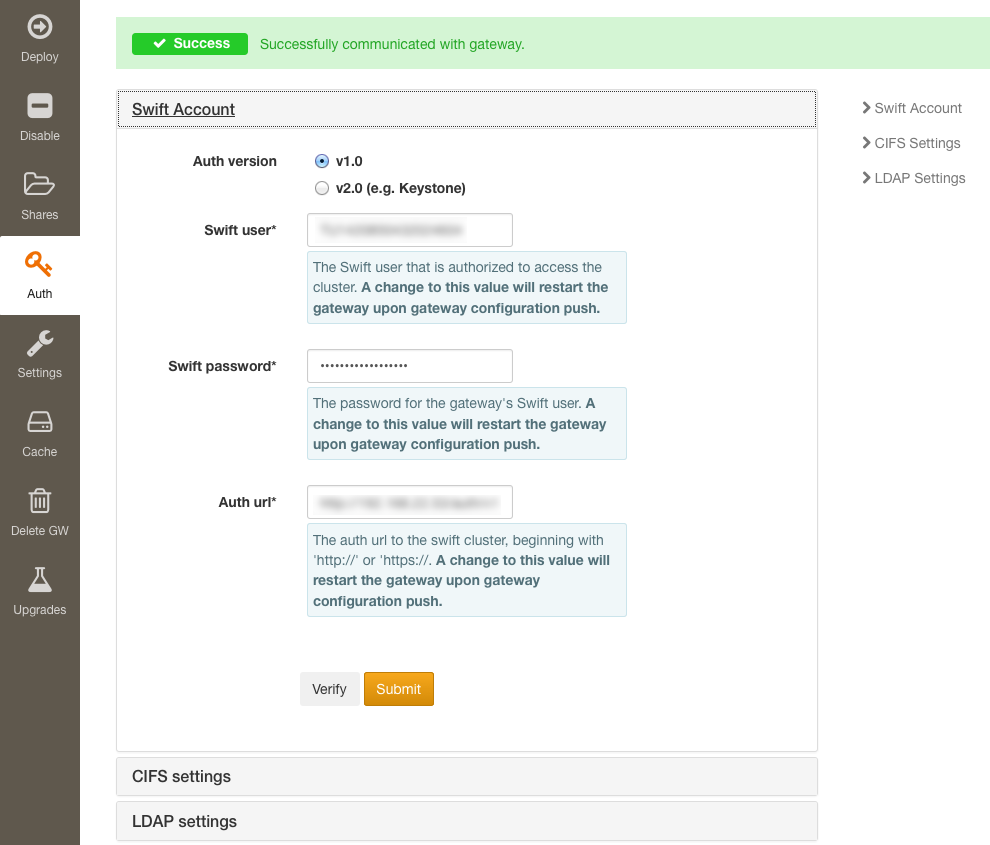
A banner will appear at the top of the page, indicating that the changes have been made.
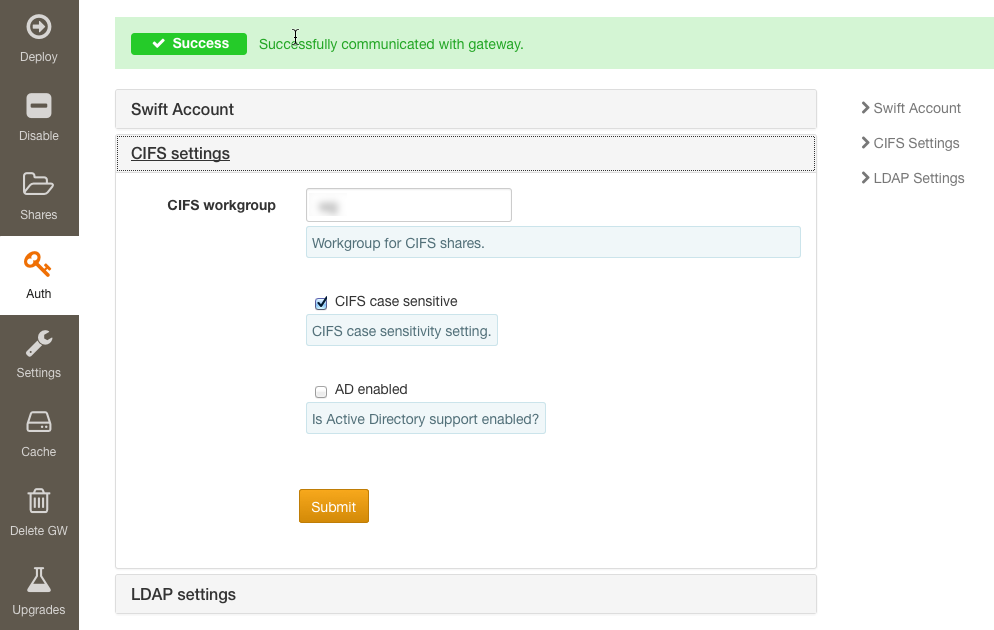
CIFS Settings
(Required once any CIFS shares are added)
Click on the CIFS tab. On this page you will set the Gateway settings for all CIFS shares.
Fill out:
Cifs workgroup: workgroup name
- This is the NetBIOS workgroup that the Gateway should belong to.
The "Cifs case sensitive" box will be checked, if you do not want to enforce case sensitivity you will need to uncheck the box.
If "AD support" is needed, check the box. More configuration options will appear. Please see the Gateway Auth Integrations page to correctly configure the AD sub-section.
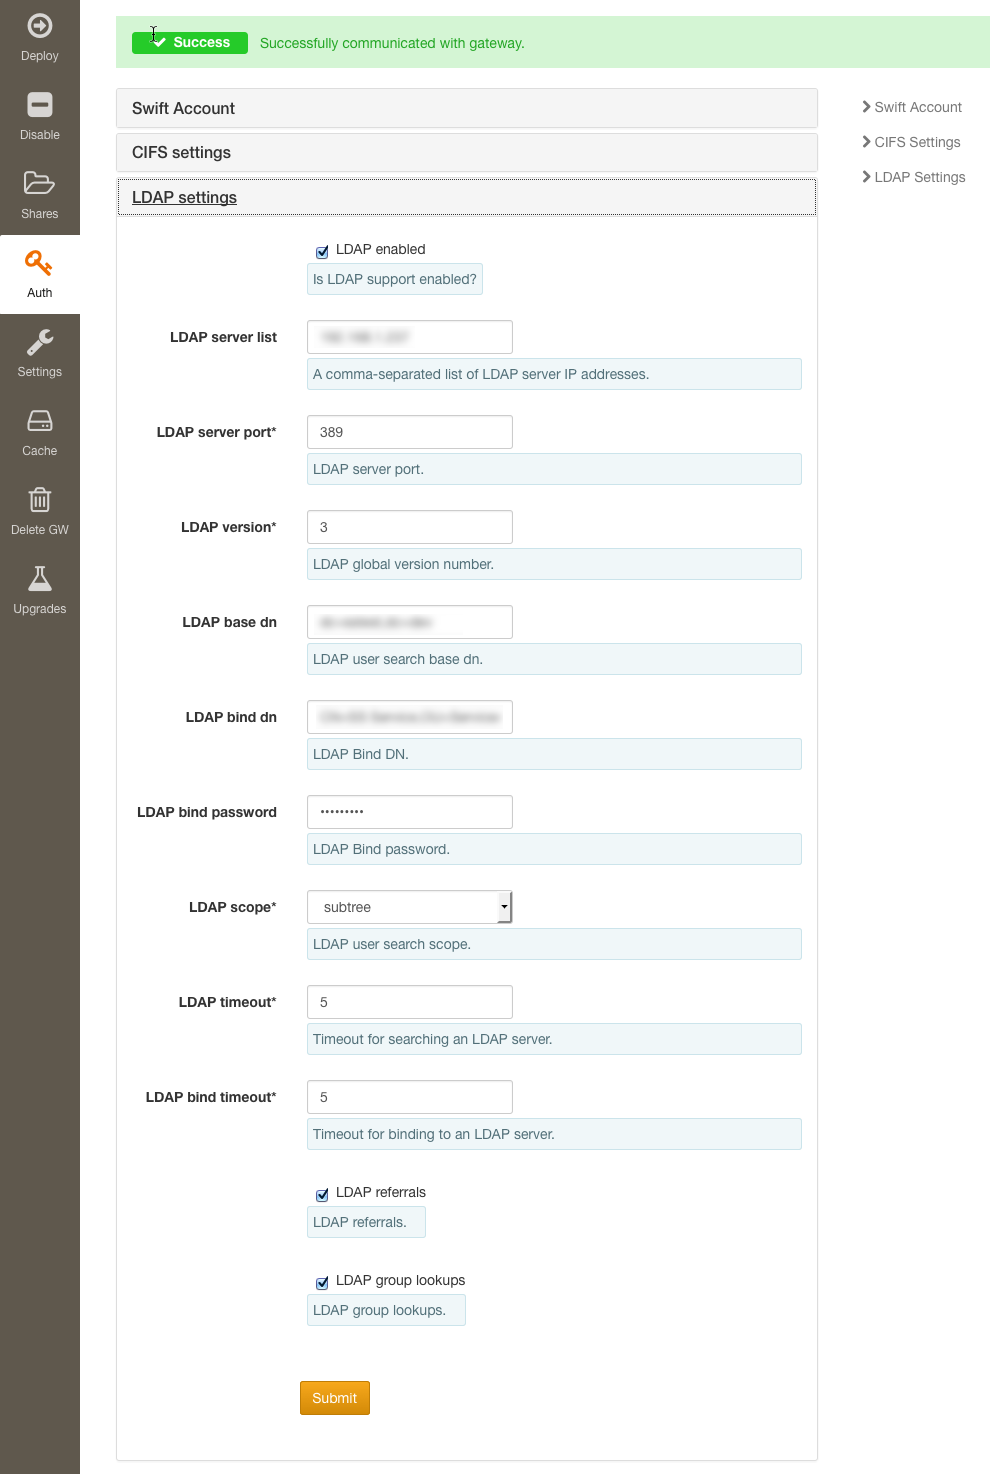
LDAP Settings
In the event that LDAP will be used for authentication, LDAP settings must be configured.
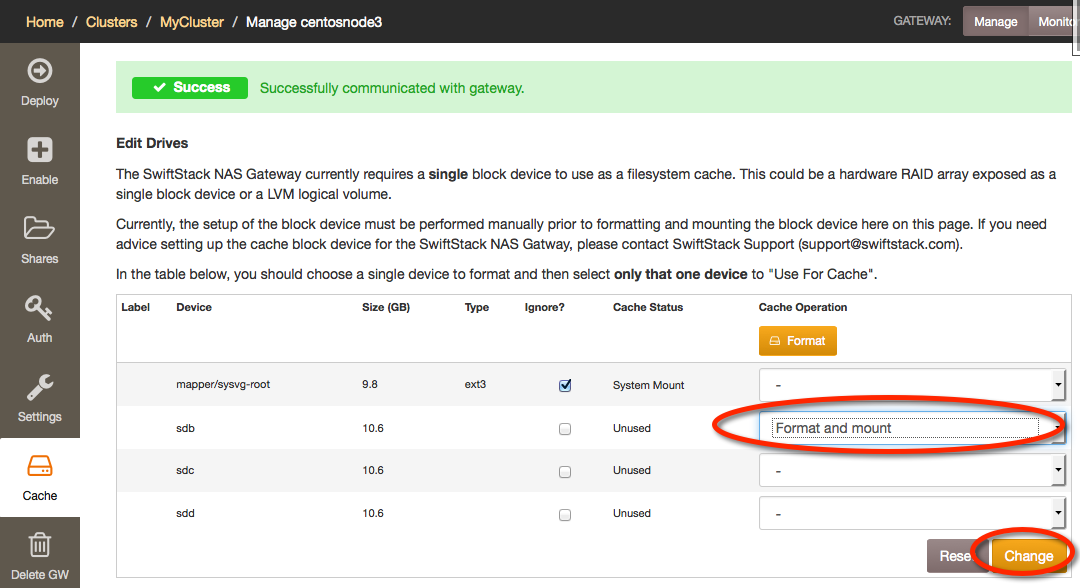
Cache Tab
On the Cache tab, you will need to format and assign one disk to be the Gateway's cache.
The cache provides a temporary staging area for the files delivered locally by the filesystem protocols (NFS and SMB/CIFS) as they are transferred to and from the Swift cluster. The cache effectively provides a network buffering area to handle the difference in the network speeds between client-to-gateway and gateway-to-cluster, caching frequently accessed files, and providing filesystem semantics.
Two steps are needed to add a cache disk to the gateway for caching: formatting a disk and designating it as the cache.
Formatting
Locate the block device you wish to use for the filesystem cache. In its Cache Operation field, select “Format and mount” from the dropdown menu. Click the Change button.
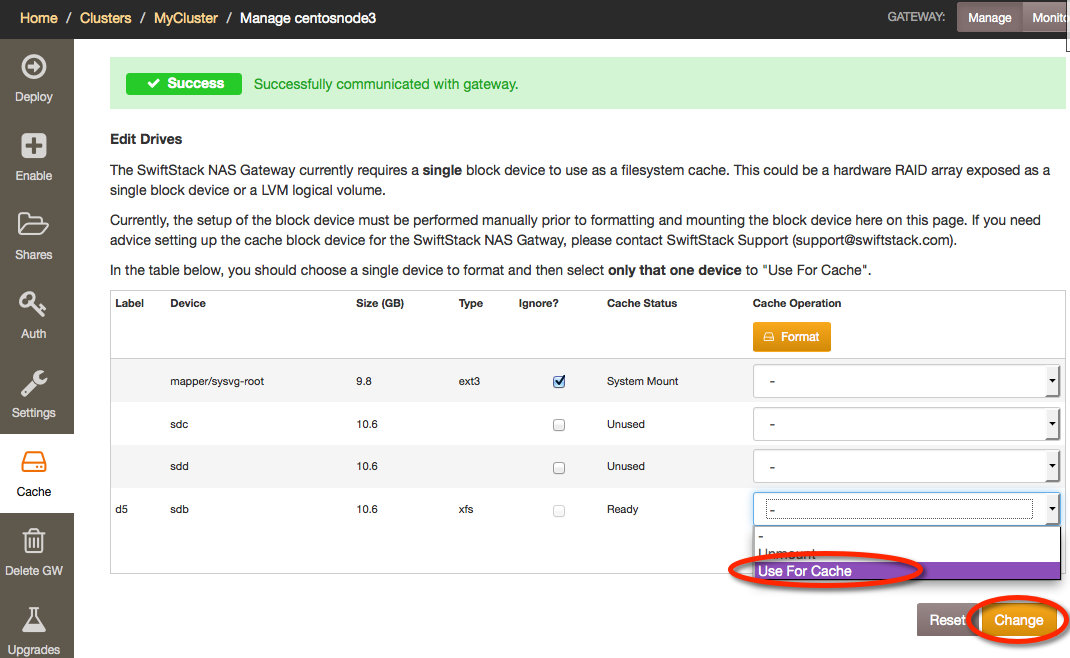
Adding as Cache
Once the disk is formatted and mounted it will have the status of Ready. The disk in now ready to be added as the gateway’s cache.
Again use the Cache Operation field, this time select “Use for Cache” from the dropdown menu. Click the Change button.
Once you have added the cache disk, you should verify the network settings of your Gateway. On the menu on the left, click on the Settings tab.
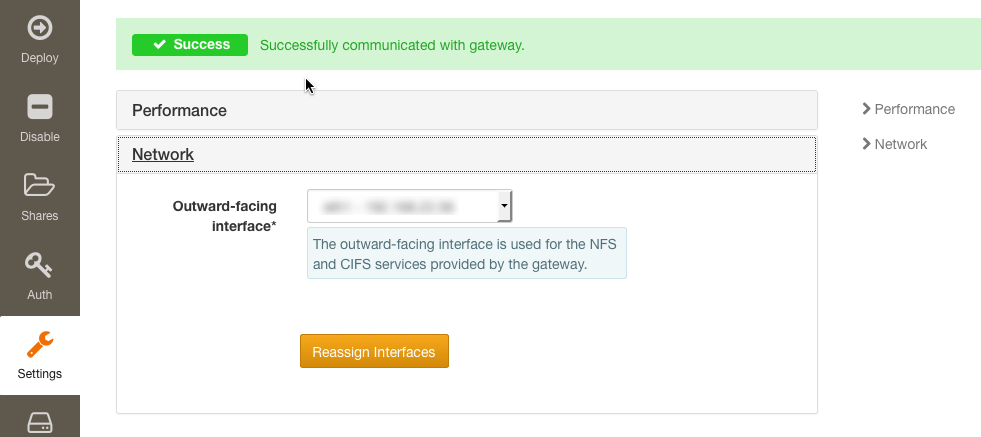
Settings Tab
On the Settings tab, there are two sections: Performance and Network.
Under the Network section, verify the network settings are correct for the Gateway.
Next you should add the filesystem mount points for the Gateway, go to the menu on the left and click on the Shares tab.
Shares Tab
On the Shares tab, you will map desired filesystem mount points to containers. Each share that you create will provide one mount point for one container — if you have three containers that need to have NFS access, you will be creating three shares. As your deployment matures it is likely you will have numerous shares listed.
Currently we support the NFS (v3) and SMB (v2.1) protocols. We will show setting up an NFS share for one container and then setting up a SMB/CIFS share for another container.
Creating an NFS Share for a container
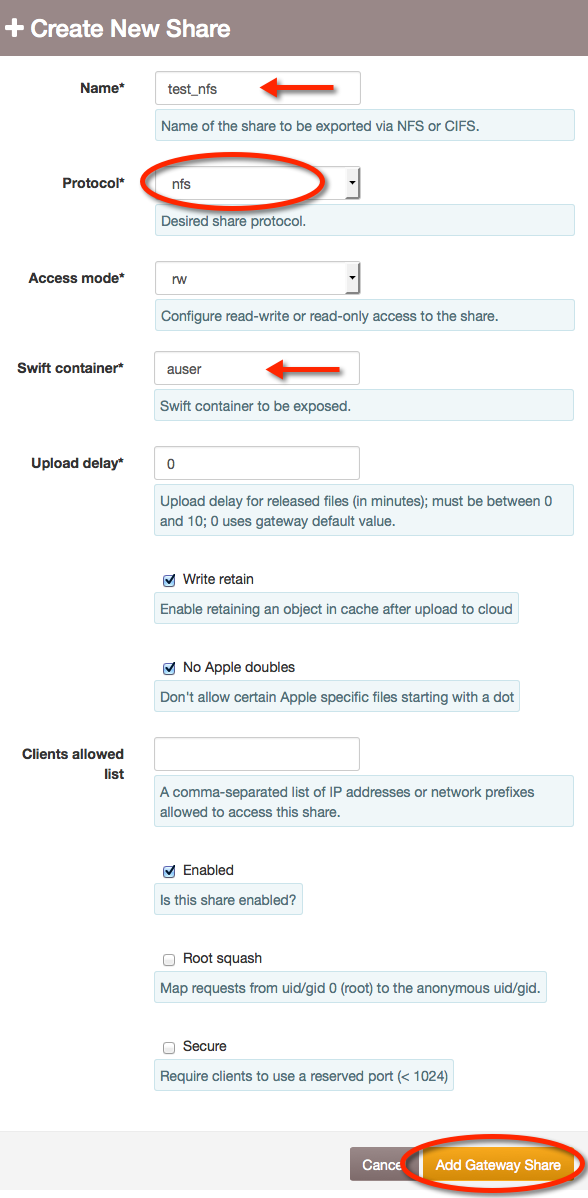
Click the + Create New Share button. On the page that opens provide the following:
- Type the name of the share in the Name field: share name
- From the Protocol dropdown select: nfs
- From the Access mode dropdown, select: rw
- Type in the name of the container in the “Swift container” field: containername
- Locate and Enabled box and ensure it is checked.
- You may also fill in any optional fields needed for your deployment.
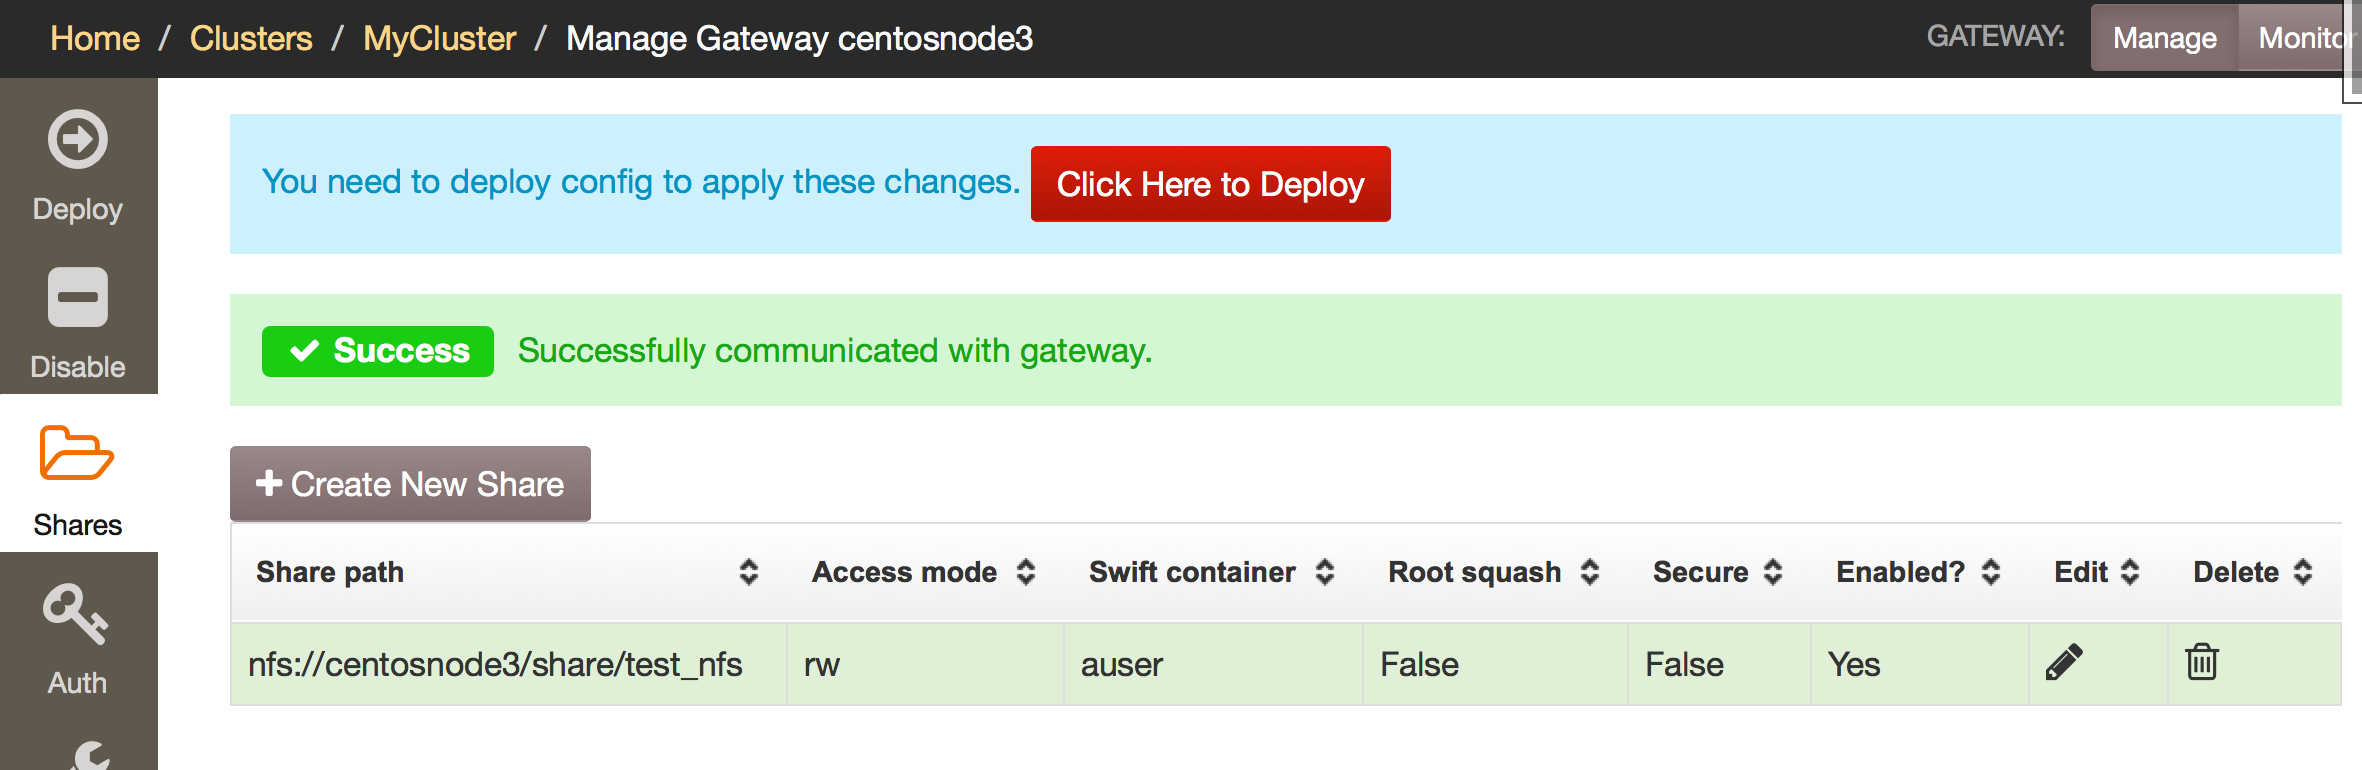
Once completed, click on the Add Gateway Share button.
The new share will now appear on the page.
Creating a CIFS Share for a container
To create our second share, again we will click the +Create New Share button. On the page that opens provide the following:
- Type the name of the share in the Name field: share name
- From the Protocol dropdown select: cifs
- From the Access mode dropdown, select: rw
- Type in the name of the container in the “Swift container” field: container name
- Locate and check the Enabled box.
You may also fill in any optional fields needed for your deployment.
Once completed, click on the Add Gateway Share button.

Enable Tab
At this point your Gateway is configured, it is time to enable and deploy it.
On the Enable tab, click on the “Enable Gateway” button.
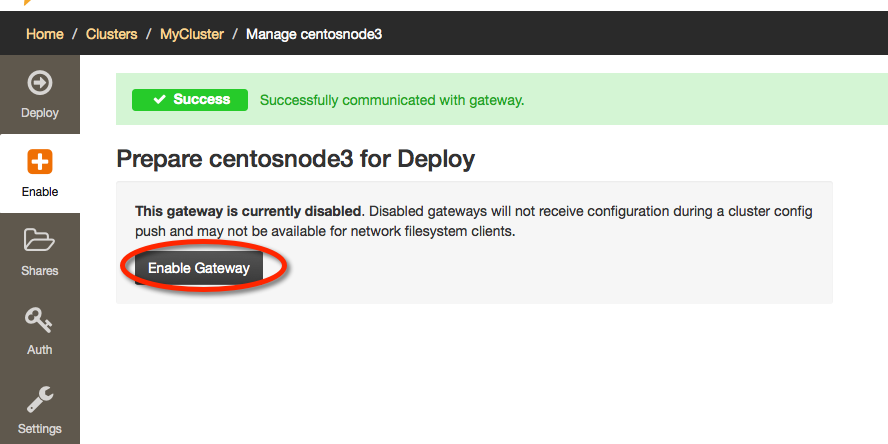
Manage Nodes page should open.
Next Step
Proceed to Deploying a Gateway.