Post-Install Setup (Standalone or Primary Controllers)
After the initial install, you must perform a one-time setup. If you are upgrading an existing controller, you can skip this section.
Setup Using the Web UI
Visit the controller with a web browser, using the suggested URL printed by the installer, or any other valid IP address or hostname. You will be prompted to accept an initially-generated self-signed SSL certificate whose Common Name (CN) is the IP address guessed by the installer. Once you trust the self-signed certificate and log in with the default credentials, you will see the following form:
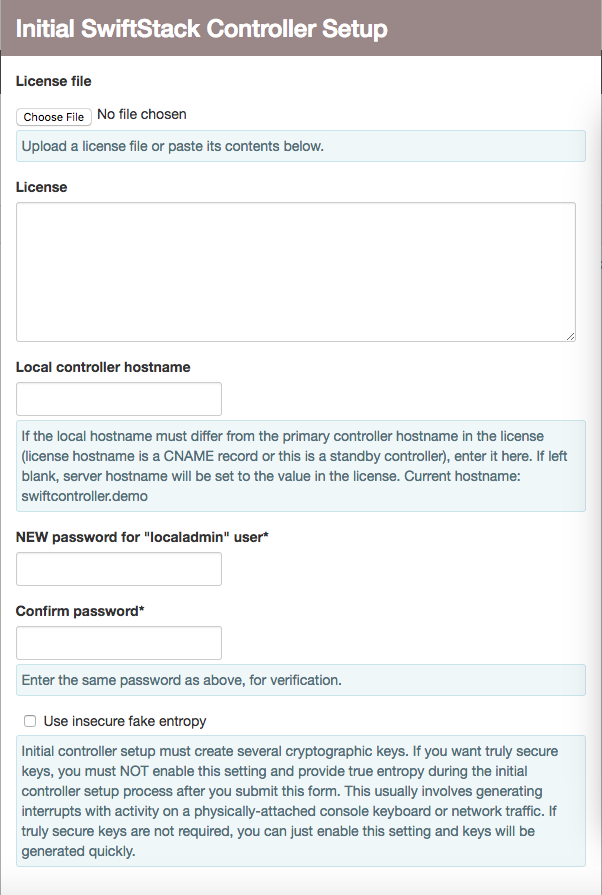
For most installations, you will only need to enter the license from
SwiftStack (you can either upload a file from your computer or paste in
the contents of the license into the text area), the local hostname (only
if different from the “primary hostname” value contained in the license),
and a new password for the "localadmin” controller superuser. You may
also choose to use entropy data from /dev/urandom when generating keys. If
you do not select that checkbox, you must generate kernel interrupts to
generate real entropy within the kernel. Methods include banging on a
locally-attached physical keyboard or generating network traffic to/from
the controller.
If the default VPN networks overlap with real networks defined in your infrastructure, you can change the default values before submitting the form.
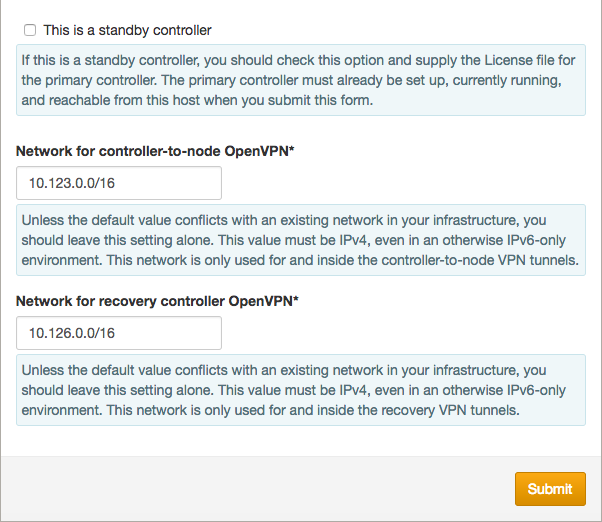
If you are setting up a recovery/standby controller, see Disaster Recovery Setup for SwiftStack Controller. Otherwise, leave the “This is a standby controller” checkbox unchecked.

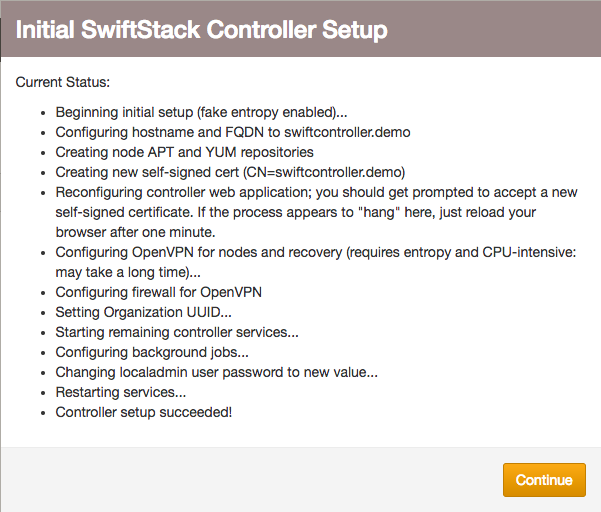
The setup process creates a new self-signed certificate with a Common Name (CN) equal to the primary controller hostname, as defined by the controller license, and restarts the controller web server. Therefore, you may need to reload the web page and also accept the new self-signed certificate. You may also be prompted to log in again, which will require either the initial default password or your new password, depending on how far along the setup process is.
After you have accepted the new self-signed certificate, logged back in if necessary, and the setup process has finished, click the “Continue” button:
Setup Using the CLI
You may instead complete post-install setup using a CLI tool,
/opt/ss/deploy/current/ssman/bin/admin/manual_setup
Run it with the “--help” flag to get a detailed usage message. Its command-line options correspond to every element of the Web UI setup form.
All the discussion of section Installing the SwiftStack Controller On-Premises applies here, but instead of web form fields, you provide input via command-line flags. The most basic invocation, for a primary controller, where you will be prompted to enter the new “ localadmin ” user password interactively, looks like this:
/opt/ss/deploy/current/ssman/bin/admin/manual_setup --license-file /path/to/license
You would see output similar to this:
/opt/ss/deploy/current/ssman/bin/admin/manual_setup --license-file /var/tmp/swiftcontroller.demo.lic
Enter a NEW password for "localadmin" user:
Same password again (for confirmation):
Beginning initial setup (using real entropy so you should generate kernel interrupts, and this may take long time)...
Configuring hostname and FQDN to swiftcontroller.demo
Creating node APT and YUM repositories (requires entropy and may take a long time...)
Creating new self-signed cert (CN=swiftcontroller.demo) (requires entropy and may take a long time...)
Reconfiguring controller web application; you should get prompted to accept a new self-signed certificate.  If the process appears to "hang" here, just reload your browser after five minutes.
Configuring OpenVPN for nodes and recovery (requires entropy and CPU-intensive: may take a long time)...
Configuring firewall for OpenVPN
Configuring SwiftStack Controller firewall using raw iptables
Setting Organization UUID...
Starting remaining controller services...
Configuring background jobs...
Changing localadmin user password to new value...
Restarting services...
Setup With Confidential Hostnames
If your organization cannot share hostnames with external entities, you can instead give SwiftStack a SHA-256 hash of the hostname. The license you receive from SwiftStack will contain this hash instead of the hostname.
To use this feature, you must use the CLI setup process.
You can compute the hash using the following command:
python -c 'import hashlib, sys; print hashlib.sha256(sys.argv[1]).hexdigest()' the.actual.hostname
The output will look similar to below:
0c1109c3a5a7d4ae08b79c006f1e3b1892a73349e0ccd97d960799320734cba5
You would include one additional command-line flag when running manual_setup:
--primary-controller-hostname the.actual.hostname