Replacing Failed Nodes
OpenStack Swift is robust to node failures. However, failed nodes will impact some request latencies and affect more total storage than a single drive failure. Therefore down nodes should be addressed as soon as possible.
Noticing Failed Nodes
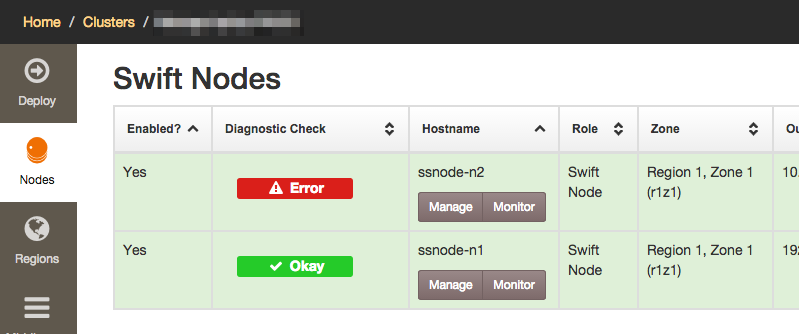
Like Failed drives, failed nodes will appear as alerts:

Note
Network infrastructure failues, including transient ones, will also manifest as "Node is unreachable" alerts. So be sure to verify that the node itself has actually failed before following these instructions.
Working Around Failed Nodes
If a node cannot be replaced or repaired in a timely manner, you should disable the node. This will allow the Swift cluster to restore full durability and availability with the remaining nodes.

Types Of Node Replacement
When a node's hardware fails and needs to be replaced, there are three possible scenarios:
- Same Operating System Replacement: A hardware failure other than the operating system boot drive and non-Swift storage (if present). Examples include the node's power supply, disk controller, RAM, or CPU.
- New Operating System, Same Primary NIC: A hardware failure which requires re-installing the operating system. The primary network interface remains the same. Examples include irrecoverable filesystem corruption on the boot drive or changing the type of media used for the operating system (moving from disk to SSD).
- New Operating System, New Primary NIC: A hardware failure which requires re-installing the operating system. The primary network interface is different. Examples include replacing a burned-out motherboard with on-board networking or completely switching out the node with a newer replacement server.
The primary network interface is eth0 unless the node does not
have an interface named eth0. In that case, the primary network
interface is the alphabetically-first non-loopback interface.
Example: given a system with network interfaces named lo,
p1p1, and p1p2, the primary network interface will be
p1p1. Even though lo is alphabetically before p1p1, it is
skipped because it is a loopback interface.'
Example: given a system with network interfaces named
em1, em2, lo, p1p1, and p1p2, the primary network
interface will be em1.
Same Operating System Replacement
When the node failure can be resolved without losing the operating system, replacement is straightforward: just resolve the problem and boot the node.
New Operating System, Same Primary NIC
The node will be unreachable while the new operating system is being installed.
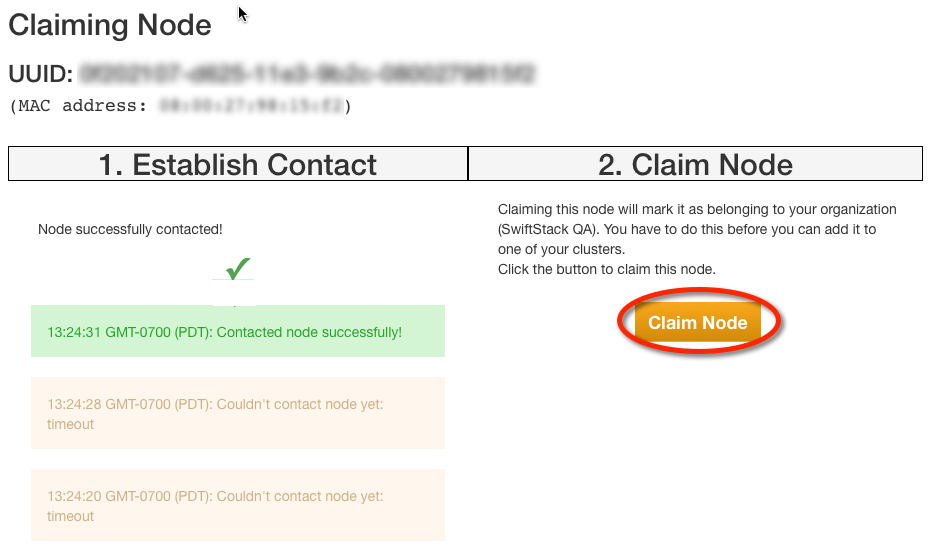
Once the failure has been resolved and the operating system installed, install the SwiftStack Node software as normal. When the claim URL is displayed after the installation, make sure you are logged into the SwiftStack Controller and visit the claim URL. Click "Claim Node".
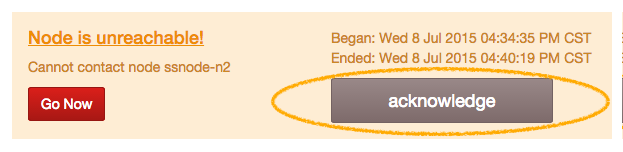
The node should come back at this point. Verify that the alert has ended, and you may acknowledge it:
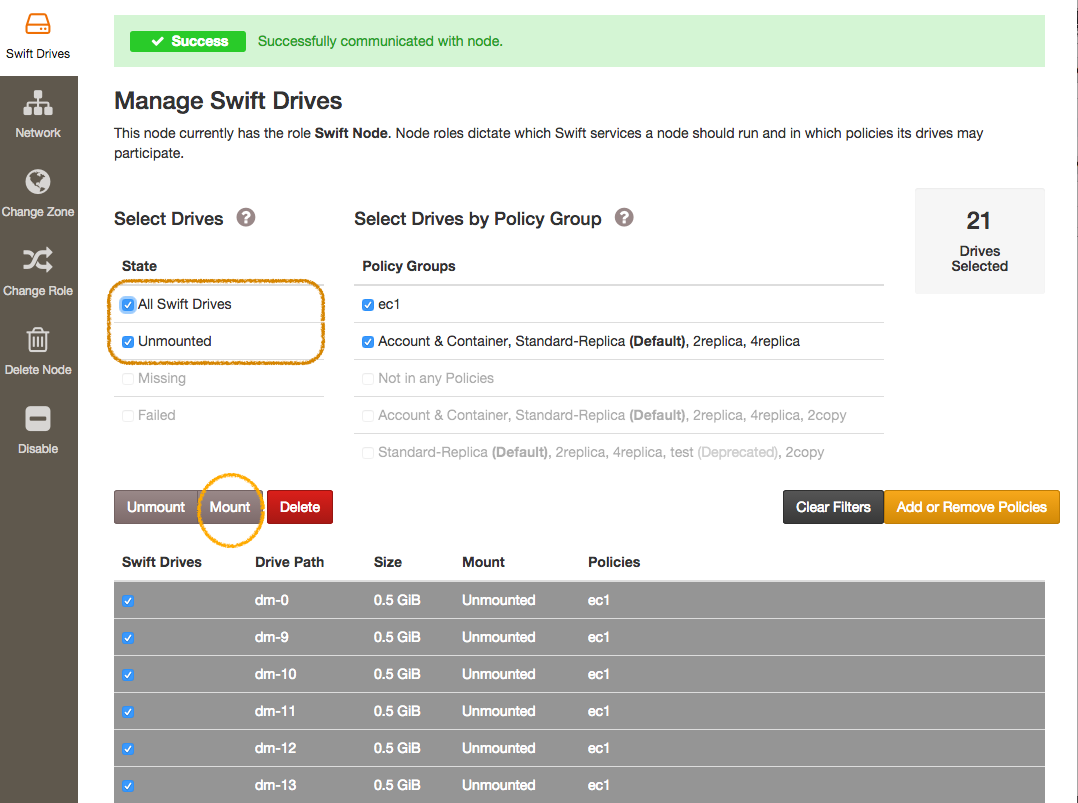
Mount all the Swift drives by selecting all devices and clicking the "Mount" button.
If the data drives in the node were replaced or lost their filesystem UUID, you will need to delete the old drive records in the "Manage Swift Drives" list.
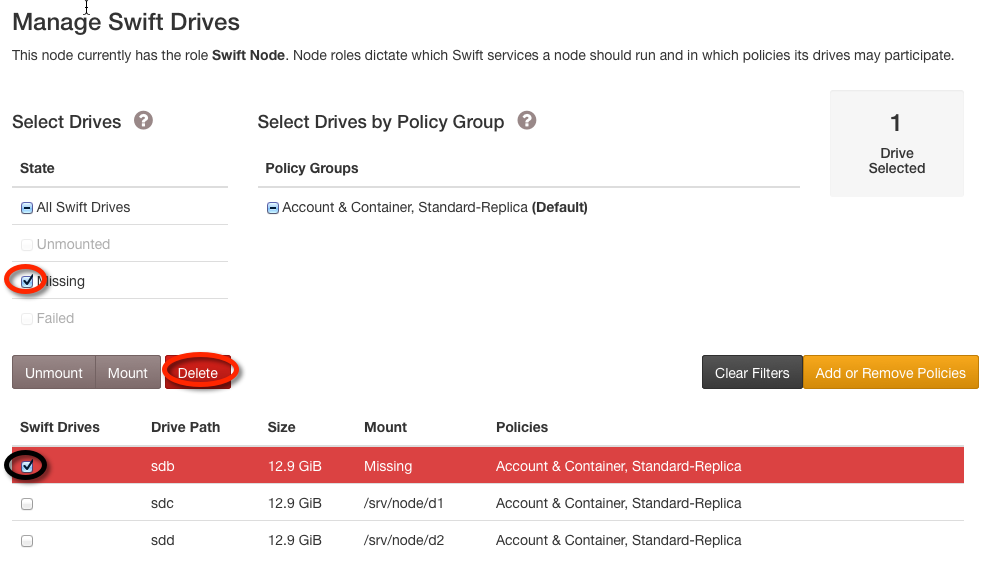
The last step is to deploy configuration to the cluster.
Note
Deleting drives can take some time as the node is contacted and fresh rings pushed to the cluster.
New Operating System, New Primary NIC
Because the primary LAN MAC will be changing, you must disable the missing node before replacing it:
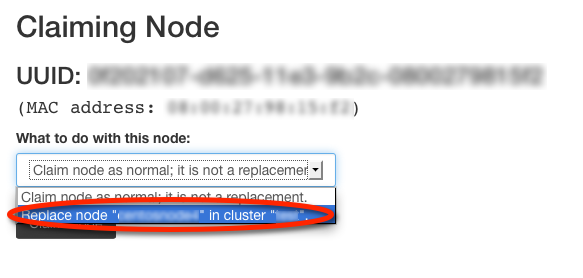
Once the failure has been resolved and the operating system installed, install the SwiftStack Node software as normal. When the claim URL is displayed after the installation, make sure you are logged into the SwiftStack Controller and visit the claim URL. Choose the disabled node in the drop-down because the node being claimed will be taking its place:
Then click "Claim Node". The SwiftStack controller will then contact the node, displaying success when it is finished. Finally, click "Claim Node" again to complete the process.
If the data drives in the node were replaced or lost their filesystem UUID, you will need to delete the old drive records in the "Manage Swift Drives" list.
Note
Deleting drives can take some time as the node is contacted and fresh rings pushed to the cluster.
Then format and add the new node's drives.
Finally, verify that the alert has ended, and you may acknowledge it: